
I was taken in by the texture, color and feltedness of this sweater. The size, however was a different matter. It was a size S from Talbot's, so it was really weensy. I decided to spend the $4.99 on it and give it a new life as a felted bag.

Last year I created this one out of upholstery scraps. It turned out to be a really handy bag and I've been thinking of making more. Enter: Talbot's size itty-bitty sweater.
I dug through my box of homemade and printed patterns, which is a heinous mess and found what I was looking for. I thought that I had devised this pattern myself, but it appears that it was printed off of the internet. I have no idea where I got it, I should have marked the pattern so I could give you credit (but who knew I'd be blogging about it?). So whoever created this pattern, thank you!

These pattern pieces are marked 1 & 2 because each piece fit on one piece of paper. After printing, I cut them out and taped them together. The numbers have nothing to do with construction. Just trying to keep it all clear.
Cutting:
1. Cut from fabric (in this case the sweater): 1 front, 1 back, 2 side pieces, 2 straps, each 2"x35" (I didn't have enough sweater for 2 straps, so I just did one.)
2. Cut from lining: 1 front, 1 back and 2 side pieces
3. Cut from fusible fleece: 1 front and 1 back
4. Cut from fusible interfacing: 2 side pieces, 1 strap length
Fuse all fusible pieces to their corresponding fabric pieces (i.e.: fusible fleece fused to the front and back pieces, fusible interfacing to sides and strap length(s)). You'll be fusing to the actual fashion fabric, not the lining. Just trying to keep it on the up and up and all clear.
Sewing:
1. Take the strap length(s) and press each long edge under 1/4 inch. Fold the strap(s) in half the long way with the pressed under edges meeting. Stitch the full length of the strap, stitching the folded edges together. Set aside.
2. Begin with the lining. Sew the two side pieces together at the center bottom. Pin, right sides together, the side (now one piece) to one of the front (or back) pieces. Be sure to pin. I used eleventy hundred pins to ease in the fullness of the front (or back) pieces. It all fits in the end, but you have to pin those curves:
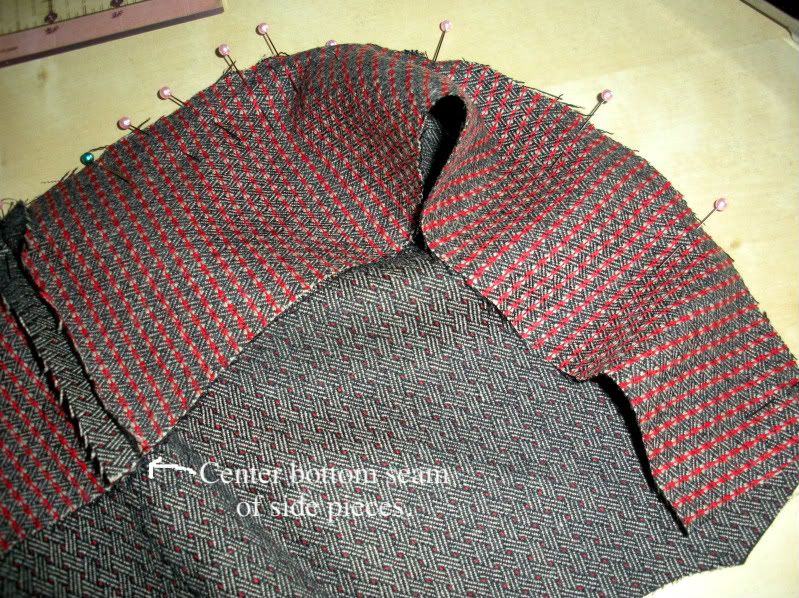
See the center bottom seam? And how the side pieces are a little narrower at the top edges? This gives the purse some shape so that it's not just a square-ish bucket. Not that there's anything wrong with that.
3. Repeat for the other front (or back) piece.
4. Time to start the main fabric event. Simply repeat what you did for the lining with the main fashion (sweater) fabric.
5. Turn the fashion fabric bag right side out and as best as you can press the seams on the right side:
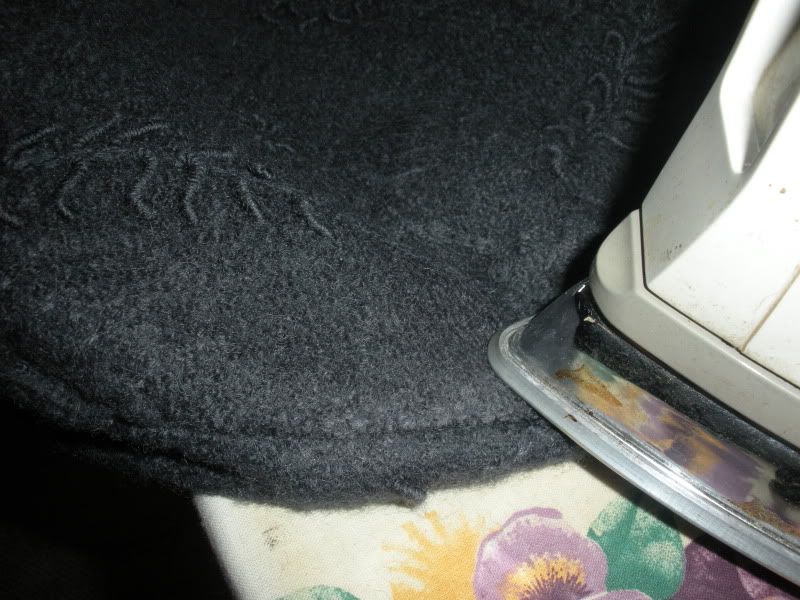
Just look at that texture! Also, make sure that when you buy a new ironing board cover at Ikea that it fits, so you don't have to show the world your skanky old cover.
5. Next, pin the strap to each side top edge, letting the strap go under the bag. Don't pin it and have it going across the top as if you could put it over your shoulder. You want it under so that when you turn the whole thing out it's where it should be:
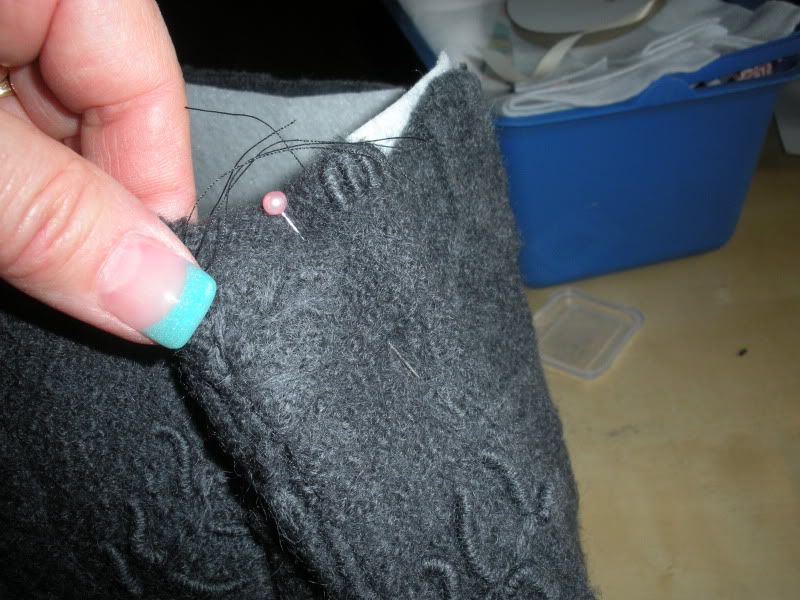
Don't judge. The aqua tips seemed like a good idea at the time. When I was 12.
6. Place the fabric purse inside the lining purse, right sides together. The wrong side of the lining is going to be facing you, and the strap will be inside, between the lining and the fabric. See:
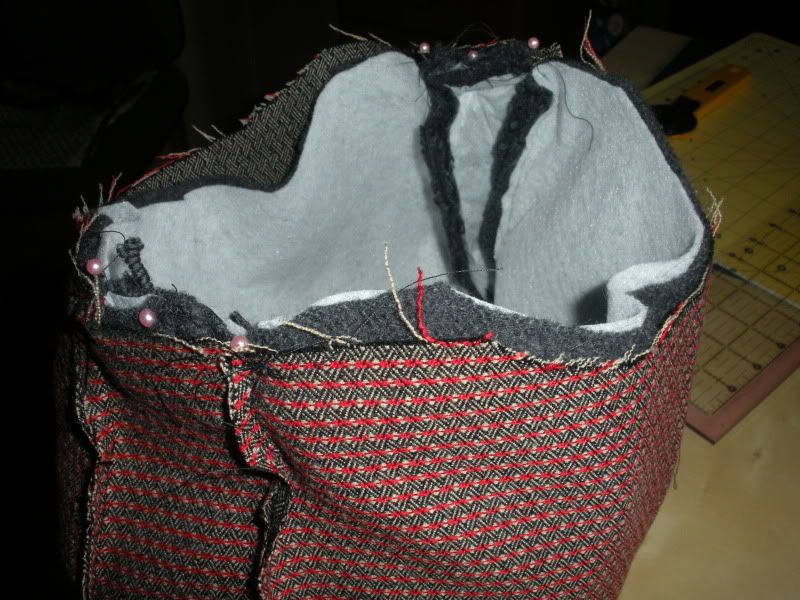
7. Sew around the top edge of the bag, leaving an opening of about 5 inches to turn. Pull the fabric to the outside, finger or iron press, remove bulk in the curves, sew a final topstitch around the top edge and you're done! It's easy to add a snap closure; add to the front and back of the lining pieces before sewing the lining and fashion fabric together.
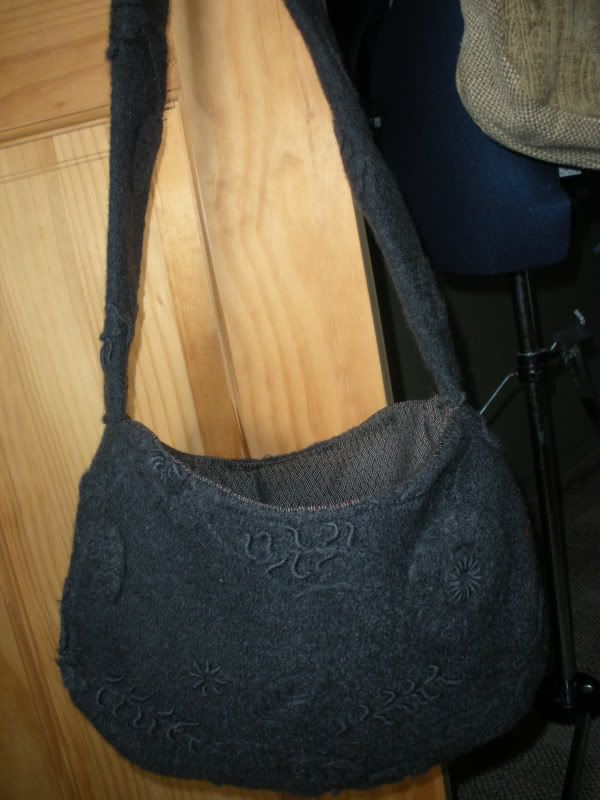
This should be perfect for fall. Or spring here in the NW, since it's fall weather anyway.
You could easily create your own pattern and make it any shape you want, using these instructions as a guide. This bag is approximately 14 inches across the bottom and about 11 inches high. The side pieces are 2 inches wide at the top, angling out to 4 inches at the widest point where the two sides pieces meet at the center bottom.
This is my very first time trying a CSI Project and I'm excited to give it a go!


Cheerio!
DeeDee
What a darling purse this sweater turned out to be!! I am loving all the refashions!!
ReplyDeletebee blessed
mary
What a great refashion - turned out beautiful!
ReplyDeleteI would love if you came and linked this project to my clothes upcycling page. It has a long term linky, so your project would stay there for more than just the week of a usual linky. We have over 60 projects linked up now – some fantastic ideas – and this month I’m upcycling lots of clothes and trying to feature lots of the links too!
Do come and take a look!
http://jembellish.blogspot.com/p/clothes-upcycling-projects.html
So cute! I love the color! Is it boiled wool?? I'm still using my felted bag you made me! :o)
ReplyDelete~Moi
I don't think it's boiled wool, T. Unless it was boiled in the washing machine, but sort of like boiled wool. Wool anyhoo.
ReplyDeleteThanks so much for linking up! We have close to 100 clothes upcycling links now!
ReplyDeleteJust letting you know I featured this project on my post today too!
Hope you have a lovely weekend!
Jill @ Creating my way to Success
http://www.jembellish.blogspot.com/
CUTE!
ReplyDeleteAdorable! I too love creating unique bags out of Vintage fabrics... and I confess that I too am a GW lurker... *winks*
ReplyDeleteDawn... The Bohemian
What a fabulous upcycled project!!! $4.99 is a great price to pay for a beaut bag. I'd love for you to share this at my ongoing linky that's exclusively for bags and totes... http://threadingmyway.blogspot.com/2012/01/threading-your-way-bags-and-totes-link.html
ReplyDeletethe feeling when i sighted at this #dress,i burst out"oh yeah,this really is a good post to go through over"
ReplyDeletethen have you come across such a fancy site yet with its name named prettytailor, it seems that there could be many things with anglish ,holy feeling,i would strive to visit it
enjoy your test